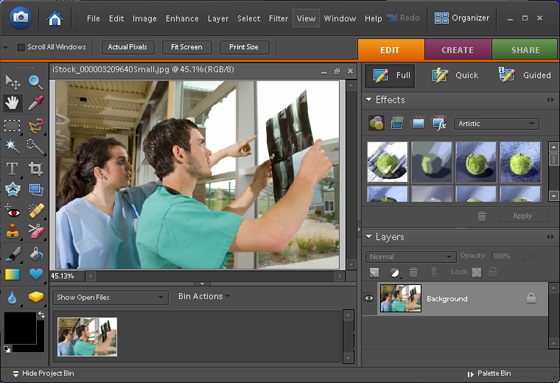
Step 1: Open an image
Open a photo into Photoshop Elements. The photo should have a light source such as an overexposed sky, highlights in clouds, etc..
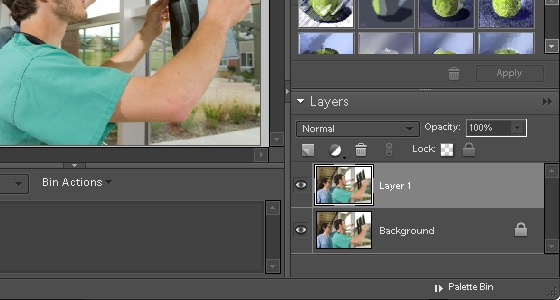
Step 2: Duplicate the background layer
Select the Background layer in the Layers palette then press Ctrl+J to duplicate the layer.
Step 3: Use the Levels tool to increase contrast
With the top layer selected, choose Enhance > Adjust Lighting > Levels. Drag the black input slider towards the left until most of the image is black except for any light source. For example, in the image below, the contrast was increase only until the window turned all white. We could have applied more contrast, but the translucent bones in the medical image would start to turn black.
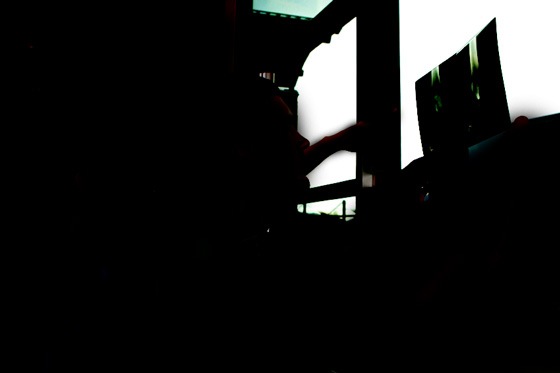
Step 4: Paint out areas that are not bright
Select the brush tool and set your foreground color to black. Paint over areas that are not bright. With the image used in this tutorial, everything except the windows and the bones in the medical image were painted black.
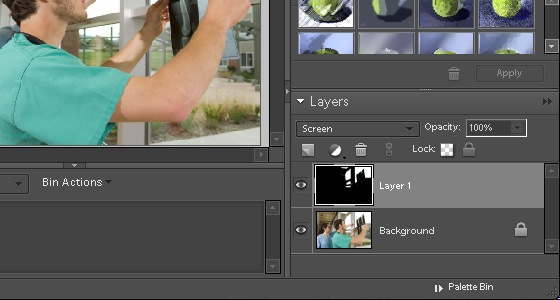
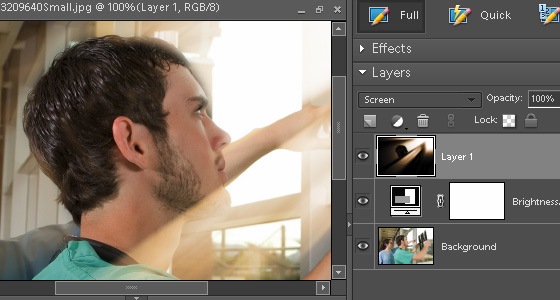
Step 5: Change the blend mode to Screen.
In the layers palette, select the top layer and change the blend mode to Screen. This will make the layer blend so that only the highlights (white areas) are visible.
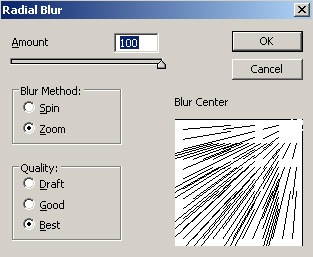
Step 6: Apply Radial Blur
With the top layer selected, choose Filter > Blur > Radial Blur. Copy the settings from the image below. In the Blur Center settings, move the target to where you want the light to blast from. For example, I positioned the blur center to the top right corner so that the light blast out from the top right to the bottom left.
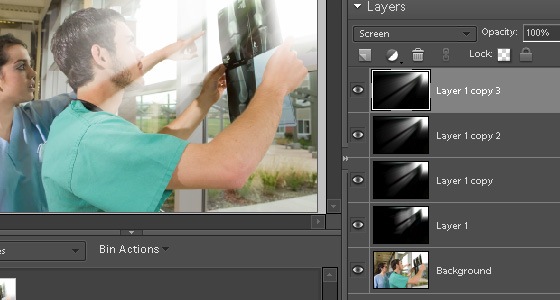
Step 7: Duplicate the layer and repeat the Radial Blur filter
Right now, the ray of light in your image will look very faint. In this step, we'll repeat a process of duplicating the layer and repeating the Radial Blur filter to extend and brighten the ray of light. Press Ctrl+J (duplicate layer) then Ctrl+F (repeat previous filter; Radial Blur) three times or until you get results that you like. You should end up with several layers and a more visible ray of light.
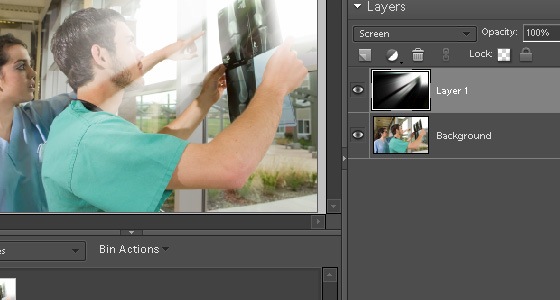
Step 8: Merge the layers
Select the top layer then press Ctrl+E several times until there are only two layers left.
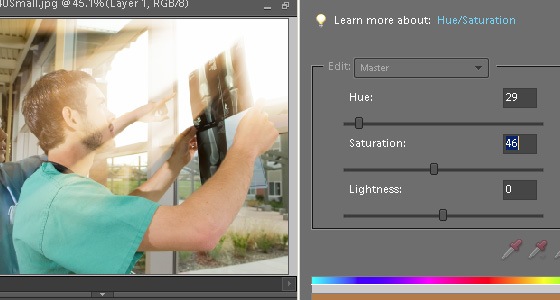
Step 9: Tint the light
With the top layer selected, choose Enhance > Adjust Color > Adjust Hue/Saturation. Inside the Hue/Saturation tool, checkmark the Colorize option near the bottom right. Then, adjust the hue and saturation setting to tint the ray of light. For an warm tint, use the settings from the image below.
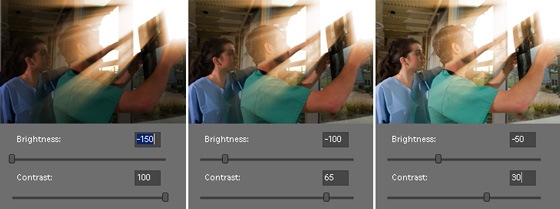
Step 10: Adjust the brightness and contrast
Select the Background layer then choose Layer > New Adjustment Layer > Brightness/Contrast. This will create a new Brightness/Contrast adjustment layer positioned above the Background layer so that it is only affecting the Background layer and not the ray of light. Adjust the settings to get the results that you like. Below are three example settings you can use.
Step 11: Selectively erase areas in the light
Sometimes the ray of light can get in the way of important areas such as the face. If you want to erase the ray of light from any area, select the top layer then select the brush tool with a black foreground color and paint over the areas.
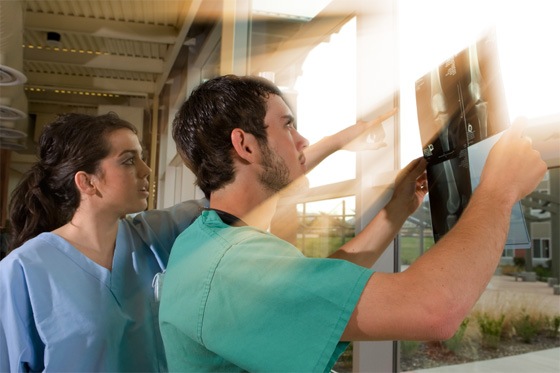
Final Results

0 komentar:
Posting Komentar