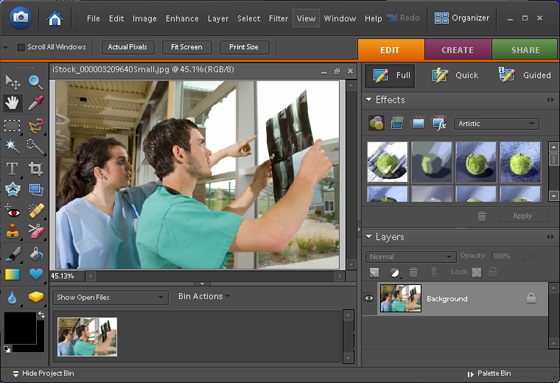
Step 1: Open a photo into Photoshop Elements
Choose File > Open. Browse for the image file then click OK.
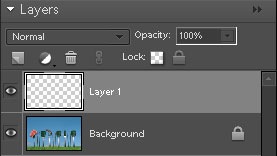
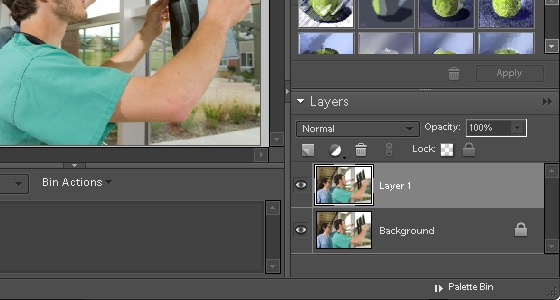
Step 2: Create a new layer
In the Layers palette, click on the

button. This will create a new layer named Layer 1. This new layer will be used to create the metal texture.
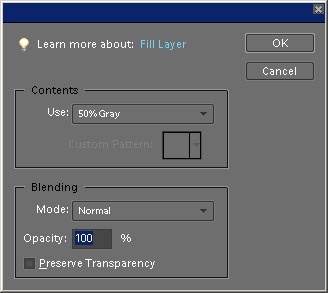
Step 3: Fill the layer with 50% gray
Next, we'll fill Layer 1 (the new layer that we just created), with a 50% gray color. To do this, choose Edit > Fill and copy the settings in the image below. Click OK and the layer should be filled with a solid 50% gray.
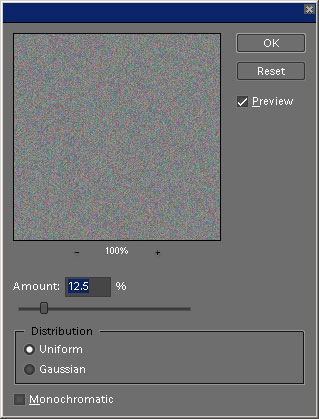
Step 4: Add noise
Choose Filter > Noise > Add Noise. Copy the settings from the image below then click OK.
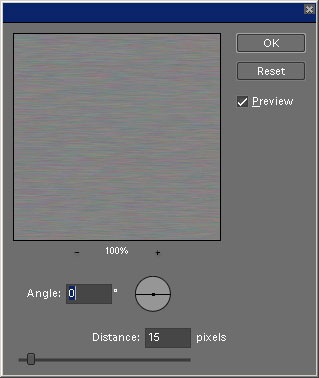
Step 5: Apply a motion blur
Choose Filter > Blur > Motion Blur. Copy the settings from the image below then click OK. You now have a metal texture. The metal texture may look quite flat now, but we'll add some lighting effects after we create the rest.
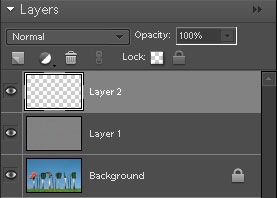
Step 6: Create a new layer
We're done with the metal texture. Now we'll add a layer to create the rust. In the Layers palette, click on the
button. This will create a new layer named Layer 2 which will be used to create the rust texture.
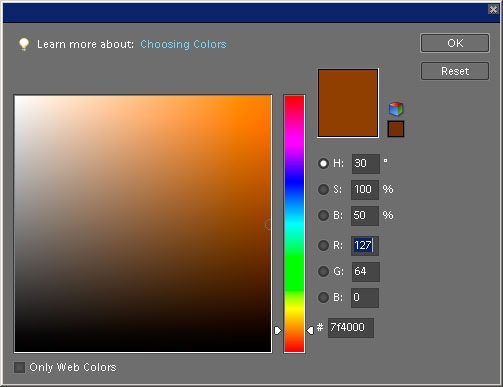
Step 7: Fill the layer with a rusty orange color
To fill the layer, we'll use the Fill tool again. Choose Edit > Fill. In the Contents drop down menu, select Color. A color picker window will appear. Enter in #7f4000 into the setting to get a rusty brown color then click OK and OK agian.
You should now have a solid brown color.
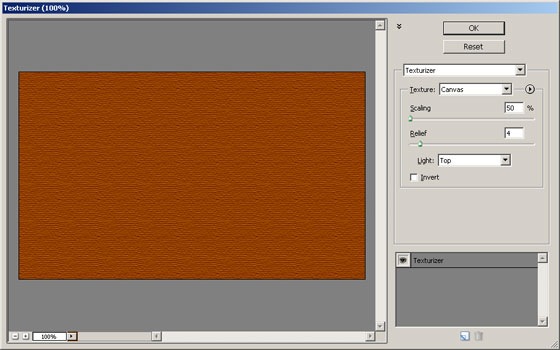
Step 8: Apply a texturizer filter
Choose Filter > Texture > Texturizer. This filter lets you add a texture to the image. Copy the settings from the image below then click OK.
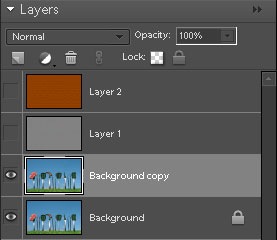
Step 9: Duplicate the Background layer and hide other layers
Select the Background layer then press Ctrl+J to duplicate the layer. Click on the

beside Layer 1 and Layer 2 to hide them.
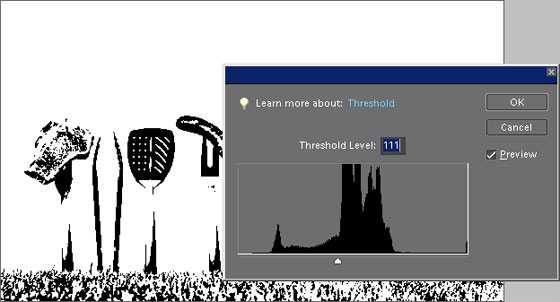
Step 10: Apply threshold
Select the
Background copy layer then choose Filter > Adjustments > Threshold. In the Threshold tool, adjust the settings to get the results that you like. The area in black will be where the rust will appear.
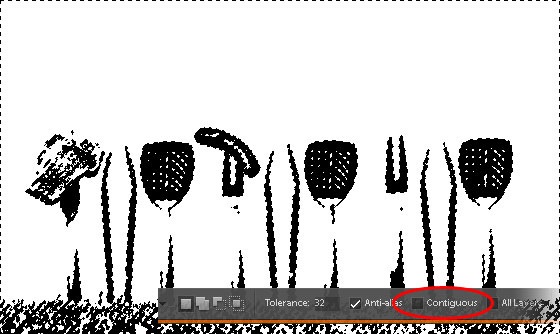
Step 11: Create a selection of the whites
Select

from the toolbar on the left. In the options bar on the top, uncheck the
Contiguous option. Click on any white area in the image. You should now have a selection of the white areas of the image.
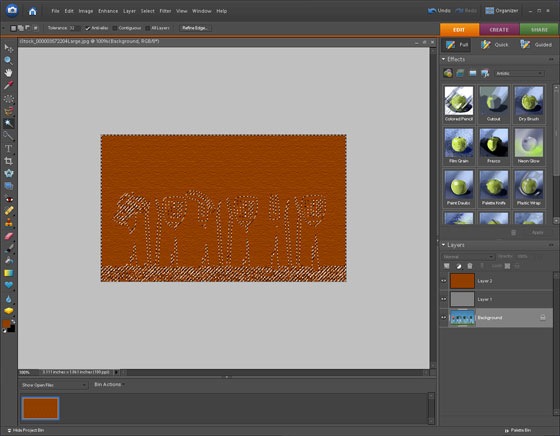
Step 12: Delete the current layer and make the two hidden layers visible
Delete the
Background copy layer then click on the visible option on the left of
Layer 1 and
Layer 2 to make them visible. There should be two
beside
Layer 1 and
Layer 2 to indicate that they are visible.
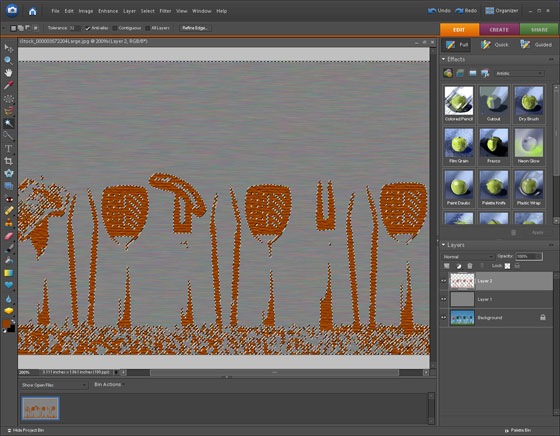
Step 13: Select Layer 2 then delete the selected area
Select Layer 2 then choose Edit > Delete to clear the selected area. Then, choose Select > Deselect to remove the selection.
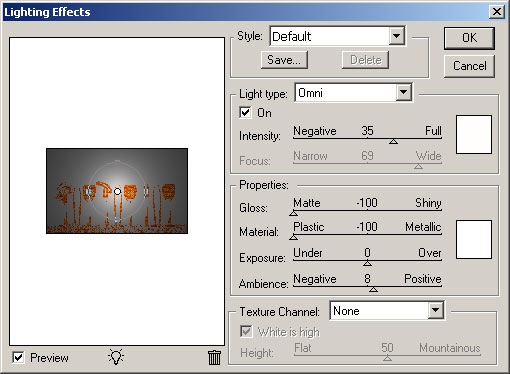
Step 14: Add lighting effects
You now have a metal and rust artwork but it looks flat. To make the work look more realistic, we'll be adding lighting effects. Select
Layer 2 with the rust texture then choose Filter > Render > Lighting Effects. Copy the settings from the image below then click OK.
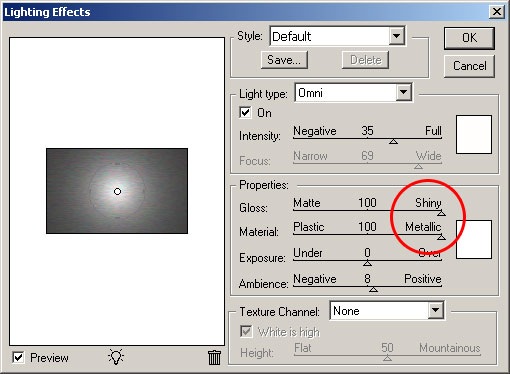
Select
Layer 1 with the metal texture and choose Filter > Render > Lighting Effects. It should load the settings used previously. Change the gloss and material setting to 100 then click OK.
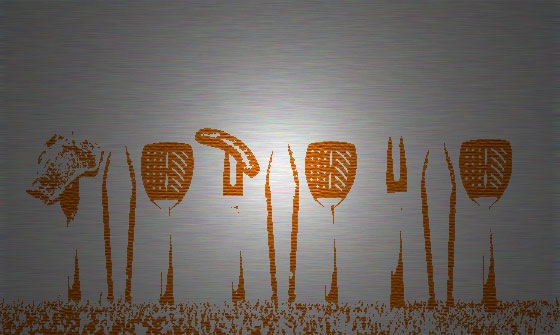
Metal Rust Art Final Results
Selengkapnya...


")


